Wednesday, July 20, 2011

Wordless Wednesday.

All photos were taken ad edited by Sam Stroud Photography.
Timothy & I highly recommend Sam; he is amazing!


Kelly Anne

Monday, July 18, 2011

Invitations!

Again, our invitations were one of the few aspects of the wedding that didn't require complete DIY on my part.  However, this is only thanks to the fabulous Natalie Vereen-Davis!  


The original plan was to make the invitations myself and to utilize Archiver's (this fabulous specialized paper, stationary and scrapbook store in Raleigh); however, after assessing the project I realized I needed to seek the help of a professional.  Natalie is amazing.  She is a friend of ours, but also designs and creates invitations and other super-cute stationary products.  You can check her out over at her Etsy's shop.


I knew that Natalie would have let me pick her brain for all the tips and tricks of the trade, but I also knew that my knockoff version would never live up to a Vereen-Davis original.


Natalie and I exchanged a number of emails, and I sent her a few inspirational invitation examples. The result was our beautiful-super stylish-very us invitations.  I am obsessed with our invites and can't thank Natalie enough!  I did torture her with font selection and actually ended up falling in love with her first choice, but Natalie was super patient with me throughout the entire "creative" process.


The only DIY required was the green belly bands.  All I had to do was add a small dot of glue and attach our monogrammed medallions. Not bad at all - considering all the work it could have been, had I tackled this project on my own.


Of course we had to stuff, label and stamp our envelopes too. I used Avery Labels and the included software to design ours. It is easy to play around with the font and boarders to make the mailing labels unique.

I am definitely a DIY fan, but this is one project that was totally worth outsourcing.


If you're in the market for invitations for any event or looking for personalized stationary,contact Natalie over at her Etsy site, Crescent Moon Papers!
Kelly Anne

Sunday, July 17, 2011

Save The Dates.

My Save-The-Dates and Invitations probably involved the least amount of DIY effort on my part, but I absolutely loved them both.


For the save-the-dates, we decided on magnets. I spent a significant amount of time searching for the best website to create and order the magnets.  However, I soon realized anything tagged "wedding" was pricey, and (being my thrifty self) I was not willing to settle for the higher cost of a refrigerator magnet. After some digging, I discovered that I could make a small-business magnet for half the price.
I was able to create my own design by uploading photos and by inserting text boxes.

I used Vista Print. I definitely recommend Vista Print as they always have a great coupon code or weekly deal. We also had a great experience with their customer service department. Our first 65 magnets were not printed as they appeared on Vista's website - we were unable to read the actual wedding date when the magnets arrived. I called and Vista agreed to reprint and resend the magnets (at no additional cost) with in the first few minutes of the call. The second batch was perfect! 


The funny thing, we still have the 65 original magnets! Do you need magnets at your house?!
Kelly Anne

Friday, July 15, 2011

Returning from the diy-Wedding Abyss

Just a quick post to let you know that I am alive, well and ready to (re)start blogging!  My last post was in April and since that time I have been busy wrapping up the school year and wedding planning/crafting!  I always had my camera or smart phone handy, and I have plenty of photo documentation to share very soon.  So check back soon and often for all the fun that led to a beautiful-fun filled-perfect wedding day!

And of course a sneak peak to spark your interest…


photo by Kimberly Ponthieux of Little Moments Photography

photo by Rodeny Sadler. 
photo stolen and posted on Facebook by Martha Ratcliff :)

photo by Sam Stroud of Sam Stroud Photography
Kelly Anne

Saturday, April 23, 2011

St. Patrick’s Day Recipes (Successes and Busts)


I'm back! And hopefully I'll be posting more frequently, but I can't make any promises as wedding plans are officially in full swing. Between showers, girls-beach weekend and DIY weekends the next few months are packed full (oh, and that whole work thing too). Now to St. Patrick's Day…

Since the start of America Idol, a group of friends, Timothy and I have started a supper club. We all get together on Wednesday and Thursday to eat and watch American Idol. We rotate between four houses, which is awesome because each person only has to cook once every two weeks for the club. Well one of my nights fell on St. Patrick's Day Thursday and I decided to get festive with my cooking.

I decided to make Green Enchiladas and a Green Velvet Cake. The enchiladas were a hit, but I felt the cake was a bust! My friends were too nice and each ate a slice saying they did enjoy it, but I'm telling you something wasn't quite right. I'm wondering if it is possible that green food coloring vs. the traditional red food coloring made a real difference. It's not that it was horrible, but something wasn't 100% tasty. Who knows! It was a pretty cake though, and I've included pictures below.

Enchiladas first, start with a dry mix and a wet mix, then add half of the wet to the dry.
 Dry Mix = shredded chicken, refried beans and shredded cheese.
Wet Mix = Enchiladas Sauce, 1 can tomato soup, 1 can cream of mushroom soup, 1 can of Rotel  
 Remember to combine half of the wet into the dry, spoon the mixture onto tortilla. (I used spinach tortillas as a St. Patrick's Day treat).
Before baking, pour the remaining wet mixture over the top of enchiladas. 
Bake at 350 for 20 mins.
I forgot to take pictures of the final product, but this recipe makes a huge batch and are oh so yummy!


Now to the cake, I didn't save the recipe word-for-word because I doubt I'll make it again, but here are the photo highlights...
It was very pretty, but according to me, that was about all - just pretty.
Kelly Anne


Monday, April 4, 2011

The Missing Piece

I currently cannot find my camera cord, and thus there have been a lack of new posts.  I've searched high and low, but keep coming up short.
     As soon as I find (or repurchase) the cord, there will be St. Patrick's Day recipe posts, vegetable garden posts and some random ramblings I'm sure.
     Here's hoping I find that stinkin' cord!
Kelly Anne

Sunday, March 20, 2011

Tim’s Texas Tavern Trip


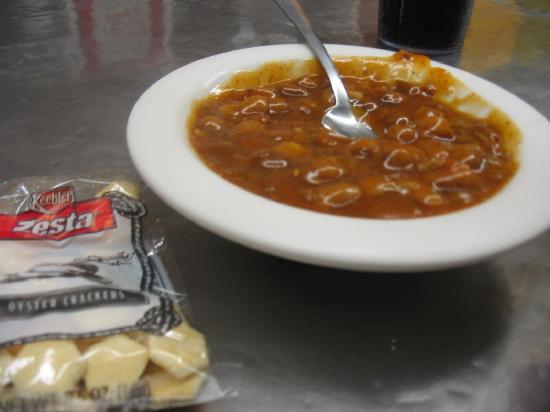
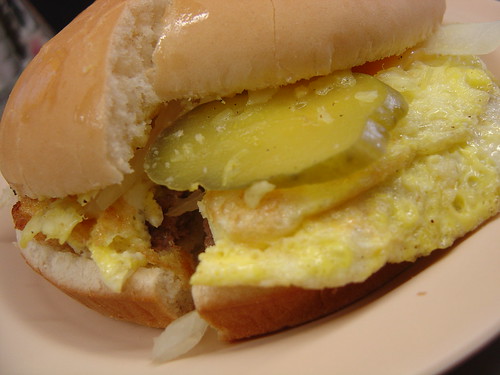
If you are from Roanoke, you definitely know about the Texas Tavern. Texas Tavern is Roanoke's own little episode of Diners, Drive-Ins and Dives; most would classify it as a tasty dive. It has been a Roanoke novelty since the 1930's, and not much has changed in the last 80 years. The "tavern" specializes in hot dogs, hamburgers and chili. You can order any of these three staples with onions, mustard, relish and/or a fried egg! Just don't ask for ketchup.

The Tavern has its own lingo too. If you want a hot dog with onions and relish, you would say, "one hot with hold the chili." If you want a hamburger with cheese and a fried egg, and a bowl of chili with onions, you would say, "a cheesy with and a bowl with." It is a learned art form.
My family, friends and I had been talking up the Tavern for quite some time, and during our February visit Dad, Donna and I decided to treat Tim to his fist Texas Tavern experience. Timothy was a good sport, but it definitely wasn't his cup of tea, or should I say his bowl of chili. I could have predicted this as he isn't a fan of chili with beans or mustard. He also didn't get the full experience either…
Most Roanokers will tell you the best time to visit the Tavern is after midnight and/or after a fun night out on the town. Tim definitely didn't get the full exposure at 8 p.m. But needless to say, he was excited to experience the legend that is the Texas Tavern.
Kelly Anne